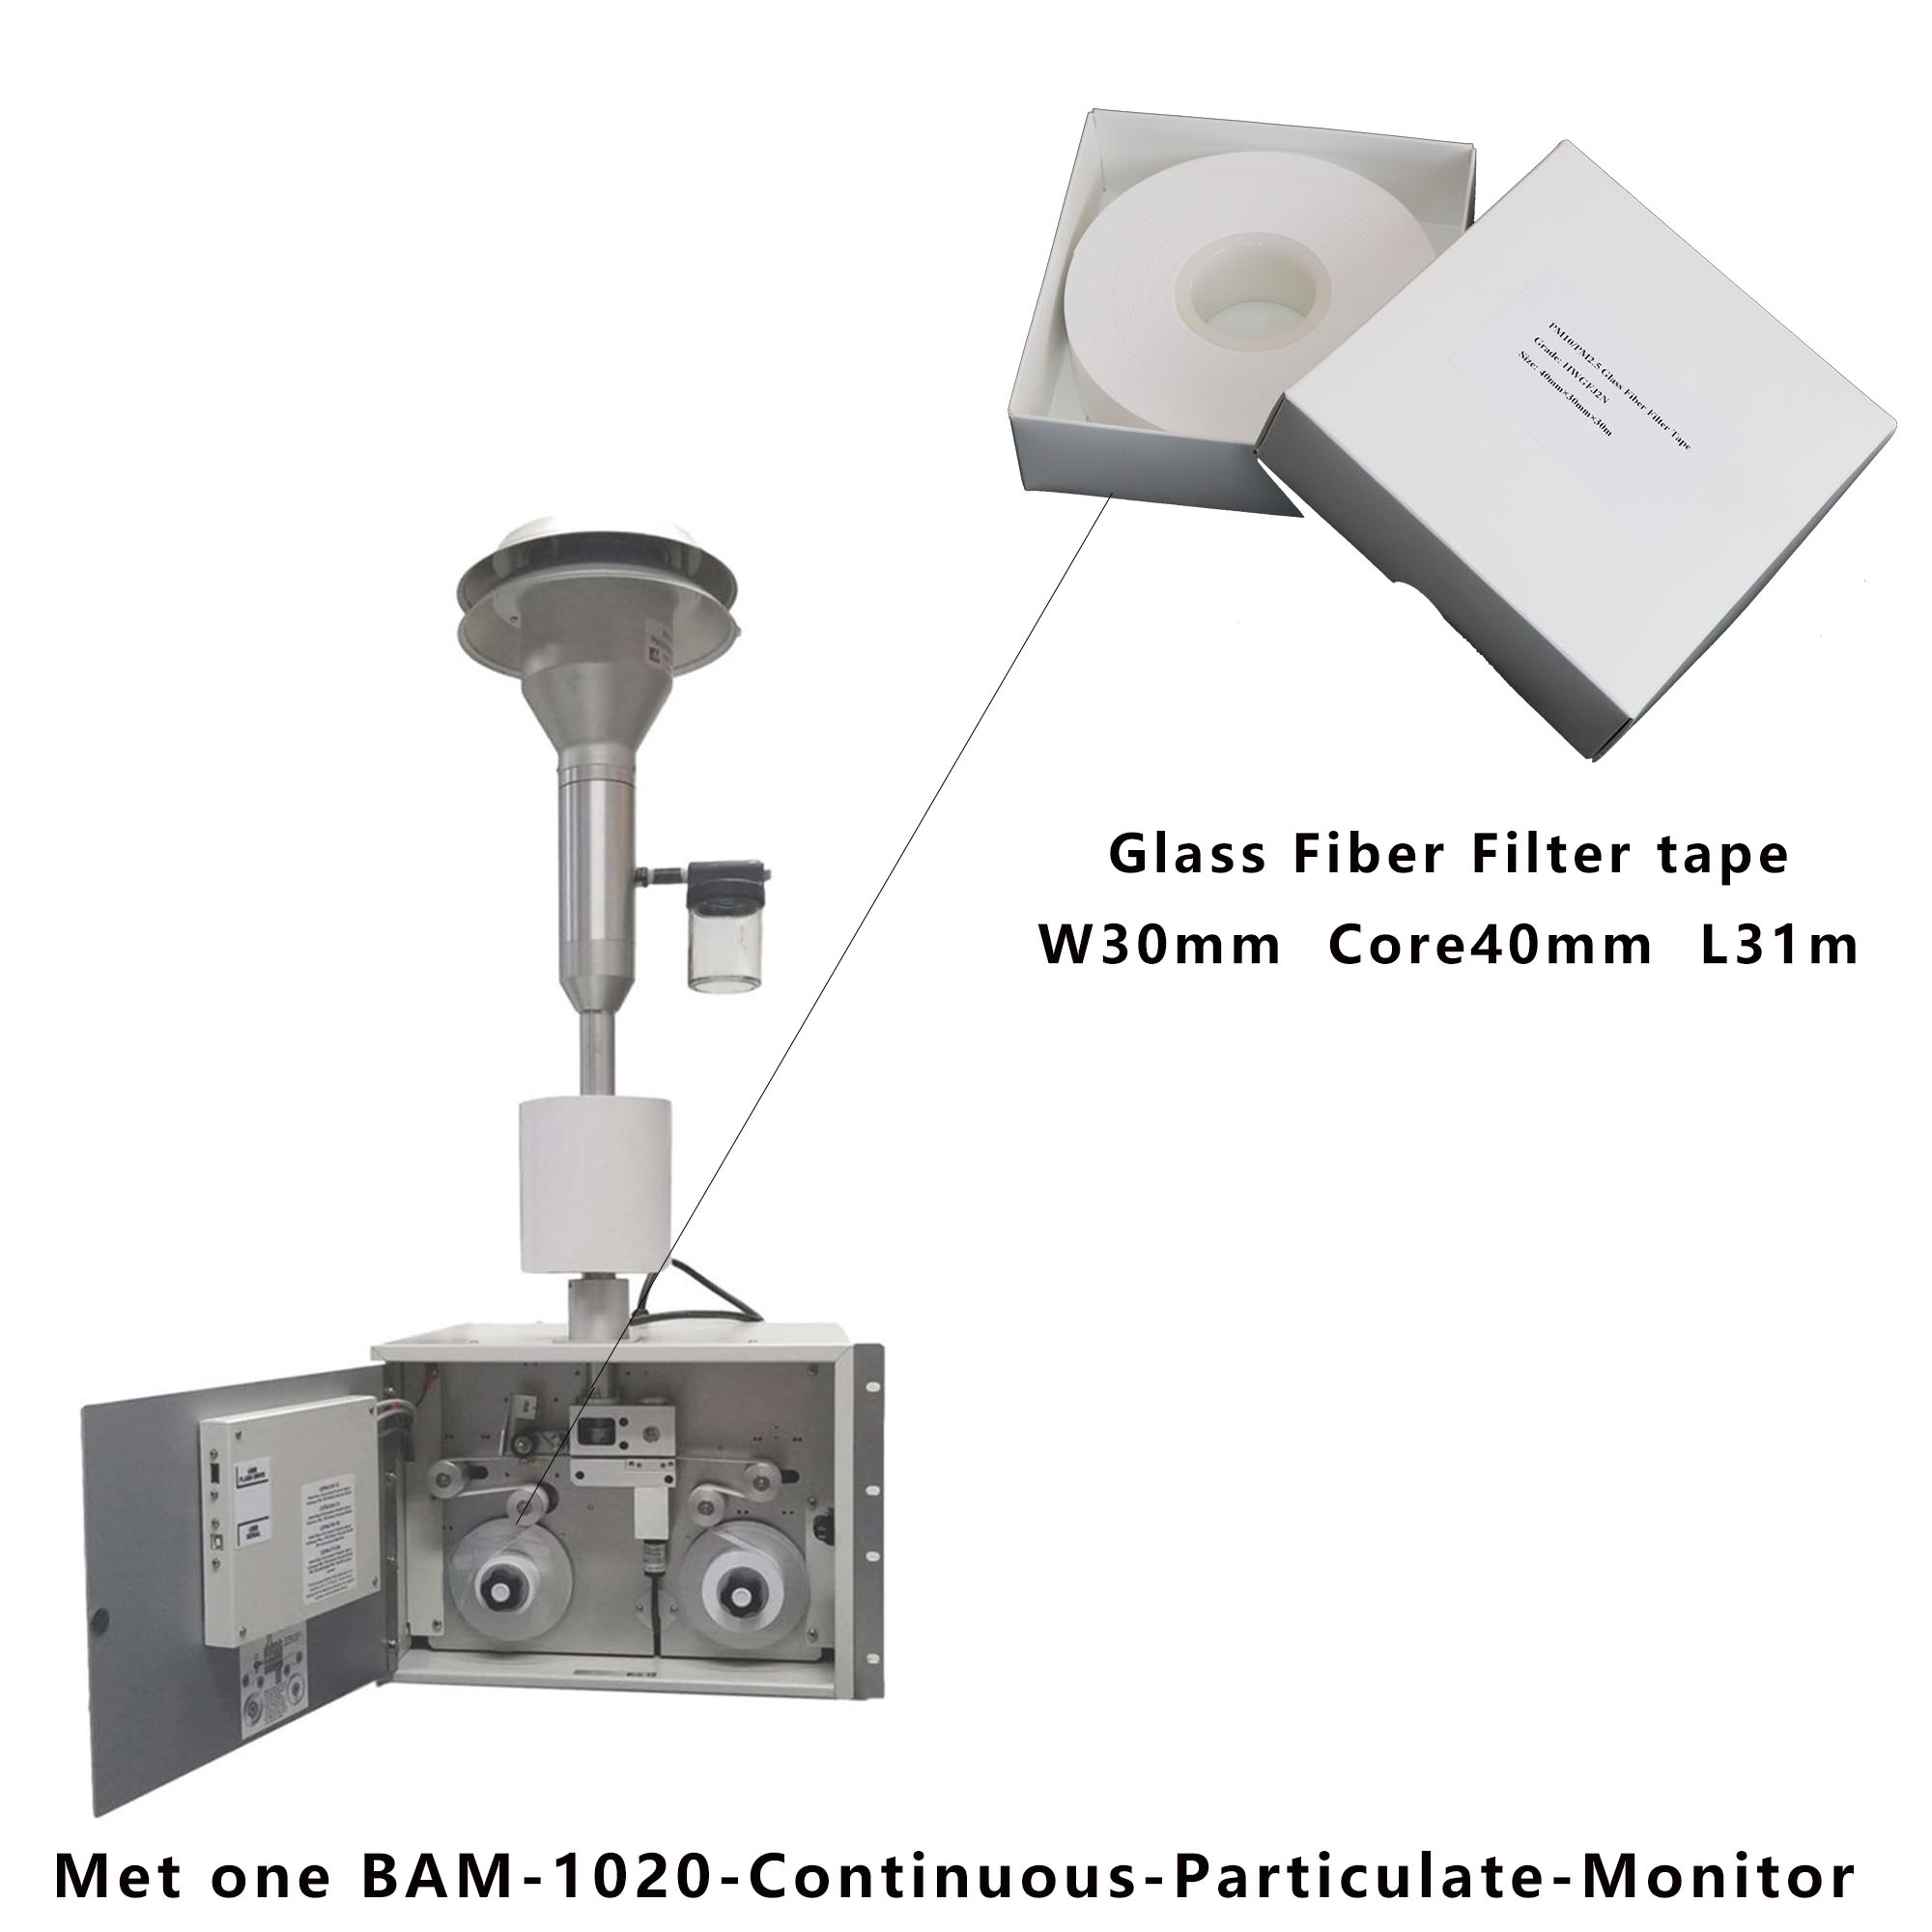
Changing the filter tape[^1] in a BAM 1020[^2] might seem complicated, but it's a necessary process to ensure accurate readings. Skipping steps can lead to errors or damage.
To replace the filter tape[^1], first ensure the machine is properly powered on. Lift the nozzle and follow the steps for installing the new tape securely and without slack.
Making sure this process is done correctly is key. If the tape is not centered or tensioned properly, readings from the BAM 1020[^2] may become unreliable. Let's break this down step by step.
What are the first steps in changing the filter tape[^1]?
The first moments of the process are critical for safety and setup. While this device is automated, error margins can arise if initial instructions are skipped.
Start by turning on the BAM 1020[^2]. The nozzle will automatically lift, giving access to the tape area. This step prepares the machine for manual adjustments.
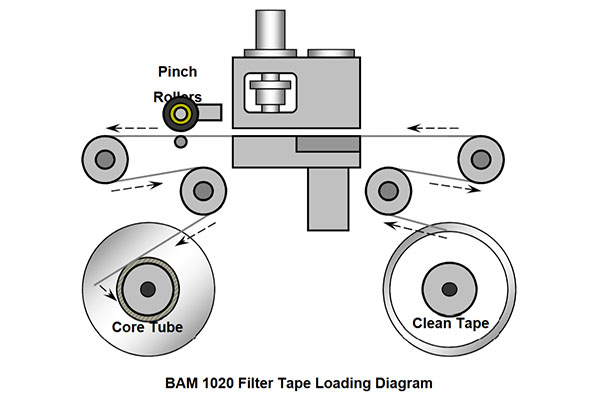
Once the nozzle is lifted, you must lock the pressure roller[^3] into place. Skipping this step could lead to uneven tape installation. Careful attention to these preliminary actions makes the rest smoother.
How do you handle the tape reels?
Proper reel management[^4] ensures the tape moves correctly during operation. This part can feel tedious but is essential.
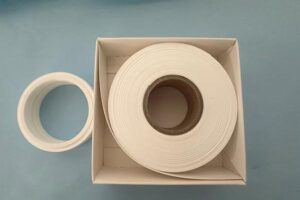
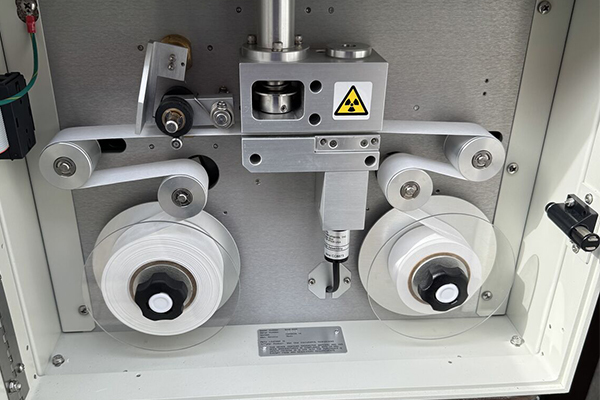
Place the empty paper tube on the left reel. Install the new filter tape[^1] on the right reel for correct alignment. This arrangement ensures the tape follows the machine's designed flow.

Slide the tape through the mechanism, ensuring it's threaded correctly. Attach the end of the new tape to the empty paper tube securely. Take care to avoid tangling or slack during this step.
Step-by-Step Setup Table for Reels and Tape:
| Step | Action | Notes |
|---|---|---|
| Start Machine | Turn on BAM 1020[^2] | Nozzle lifts automatically |
| Secure Roller | Lock pressure roller[^3] | Prevents uneven tape placement |
| Left Reel Setup | Place empty paper tube | Required for proper operation |
| Right Reel Setup | Install new filter tape[^1] | Align for smooth threading |
| Attach Tape End | Secure tape to empty reel | Ensure firm adhesion |
This table simplifies the reel handling process. Following these steps prevents common mistakes[^5] and sets the stage for proper tensioning[^6] later.
How do you tension the tape properly?
Tensioning is where precision matters most. It impacts how the tape performs during sampling, and incorrect tension can lead to equipment issues.
Use the manual control[^7] to remove any slack from the tape. Once done, return the reel covers and center the tape. Balance is essential for smooth functioning.
After centering, access the TAPE menu and press TENSION. The machine will automatically tension the tape for proper operation, ensuring it meets the pressure roller[^3] requirements.
Dive Deeper into Tensioning Mechanics
To understand tensioning[^6] mechanics better, think of it as a calibration process[^8]. The BAM 1020[^2] uses specific pressure settings to ensure the tape stays taut and aligned during sampling. Any slack in the tape could interfere with the machine's ability to collect airborne particles[^9] effectively.
Tensioning works like this:
- Manual Adjustment: Turning the reel manually removes initial slack.
- Automated Tensioning: The pressure roller[^3] applies consistent force across the tape.
This dual process ensures the tape operates smoothly, reducing the chance of reading errors or physical malfunctions.
Common Tensioning Mistakes and Solutions:
| Mistake | Impact | Solution |
|---|---|---|
| Tape Not Centered | Skewed readings | Adjust manually before tensioning[^6] |
| Excessive Slack | Tape may tear or misfeed | Use manual reel adjustment |
| Skipped Tensioning Step | Poor system calibration | Always complete the TAPE menu |
By avoiding these errors, you extend the life of the filter tape[^1] and ensure the BAM 1020[^2] works as intended.
What's the final check before closing the machine?
The last step ensures everything is ready for operation. It's easy to overlook but critical for long-term reliability.
Lower the pressure roller[^3] carefully. Double-check the tape alignment[^10] before moving on. This ensures smooth operation and prevents early wear on the tape.

Once the pressure roller[^3] is secure, you're ready to resume regular operations with the BAM 1020[^2]. Taking time now saves hassle later.
Conclusion
Changing the filter tape[^1] in a BAM 1020[^2] requires careful attention to detail. From reel setup to tensioning[^6], every step matters. Follow these instructions for reliable machine performance and accurate readings.
[^1]: Understanding filter tape's role can enhance your knowledge of accurate readings in air quality monitoring.
[^2]: Explore the BAM 1020's capabilities to appreciate its design and functionality in environmental monitoring.
[^3]: Discover how the pressure roller contributes to the overall performance and reliability of the BAM 1020.
[^4]: Effective reel management is key to smooth operation; find expert tips to optimize your process.
[^5]: Identifying common mistakes can help you avoid pitfalls and ensure a smooth tape replacement process.
[^6]: Learn about the critical role of tensioning in ensuring accurate data collection and machine longevity.
[^7]: Understanding manual control can empower you to make precise adjustments for better performance.
[^8]: Explore the calibration process to ensure your device operates at peak accuracy and reliability.
[^9]: Understanding the collection process enhances your knowledge of air quality monitoring and its importance.
[^10]: Proper tape alignment is essential for accurate readings; learn how to achieve it effectively.